The Annapurna Base Camp trek is one of the most popular trekking routes in Nepal and a really easy one to do without a guide, sleeping and eating at guesthouses. The experience is challenging and exhausting but also extremely beautiful and rewarding. After all, walking in the high altitude of the Himalayas is not something we do every day!
The basics of the Annapurna Base Camp trek without a guide:
Duration: 9 days/8 nights
Date of travel: from March the 9th to March the 17th, 2018
Number of travellers: originally 3, 7 after the first day of the trek
Time of preparation: one month
In this post you will find all the information you need to do the Annapurna Base Camp trek without a guide. I will explain everything from the basics of the route, where to sleep and eat without carrying camping gear or how to budget your trek and prepare your backpack.
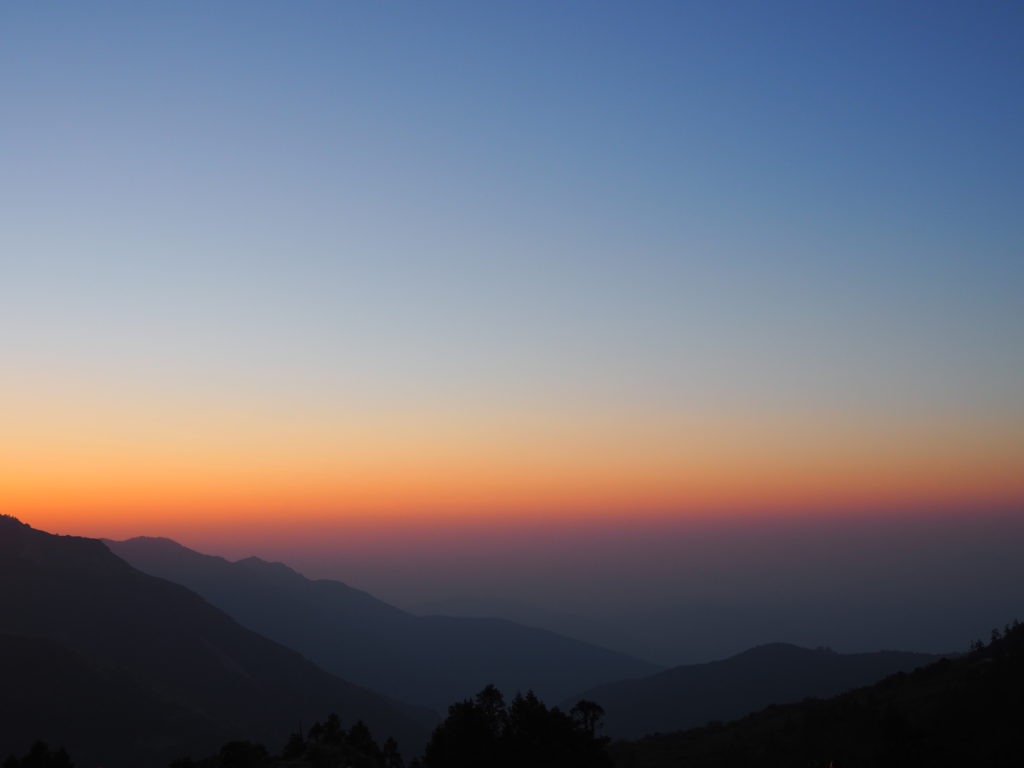
When you finish reading you will be fully prepared to meet the challenge of doing the Annapurna Base Camp trek without a guide, the experience that will allow you to walk in the greatest mountains in the whole world and see the most stunning landscapes, sunrises and starry skies you could ever imagine.
I also recommend you to read my other post ‘Walking in the Himalayas: day-by-day Annapurna Base Camp trek (ABC)’. There you fill find a very detailed account on how each day of the trek is going to look like, including transportation when needed, the type of trail you’ll be walking and its difficulty and the main marvels you will be finding along the route.
Contents
- 1. Annapurna Base Camp trek without a guide: the trekking experience
- 1.1. In a nutshell
- 1.2. The start and the end of the route
- 1.3. Side trek to Poonhill
- 1.4. Stars and sunrise over the Himalayas at Annapurna Base Camp
- 1.5. The hotsprings at Jhinudanda
- 1.6. Alternatives: the Annapurna Circuit and other trekking routes in the area
- 1.7. The weather
- 1.8. Guide or no guide for the Annapurna Base Camp trek
- 2. Preparing the Annapurna Base Camp trek without a guide
- 3. The cost of the Annapurna Base Camp trek without a guide
1. Annapurna Base Camp trek without a guide: the trekking experience
1.1. In a nutshell
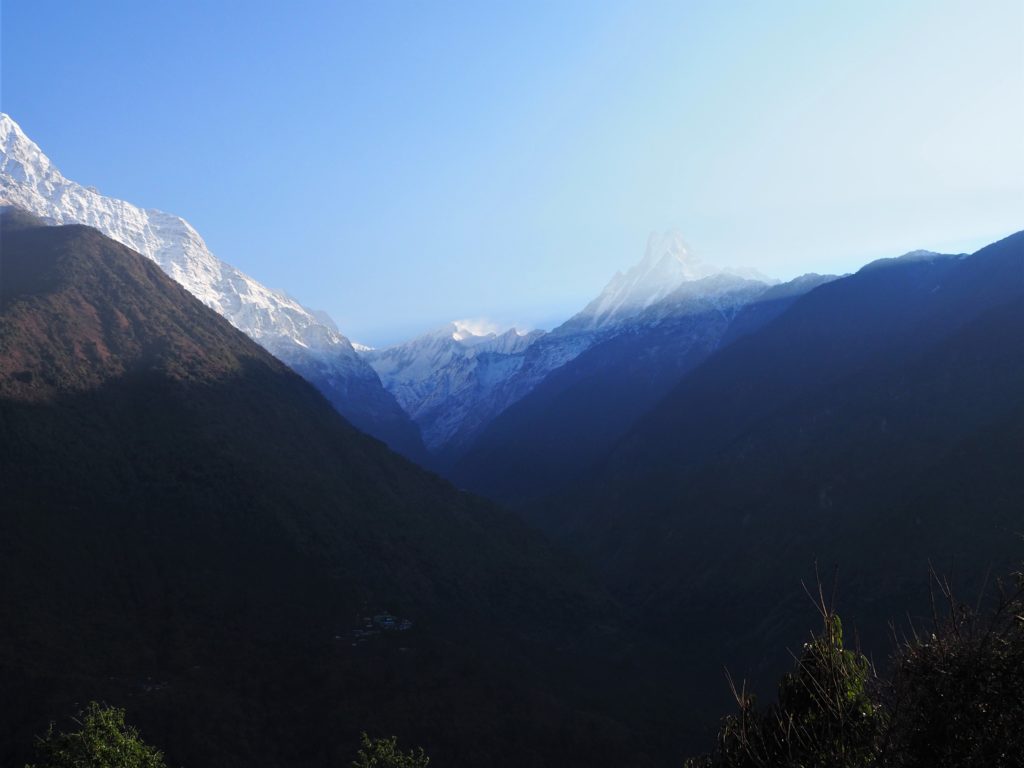
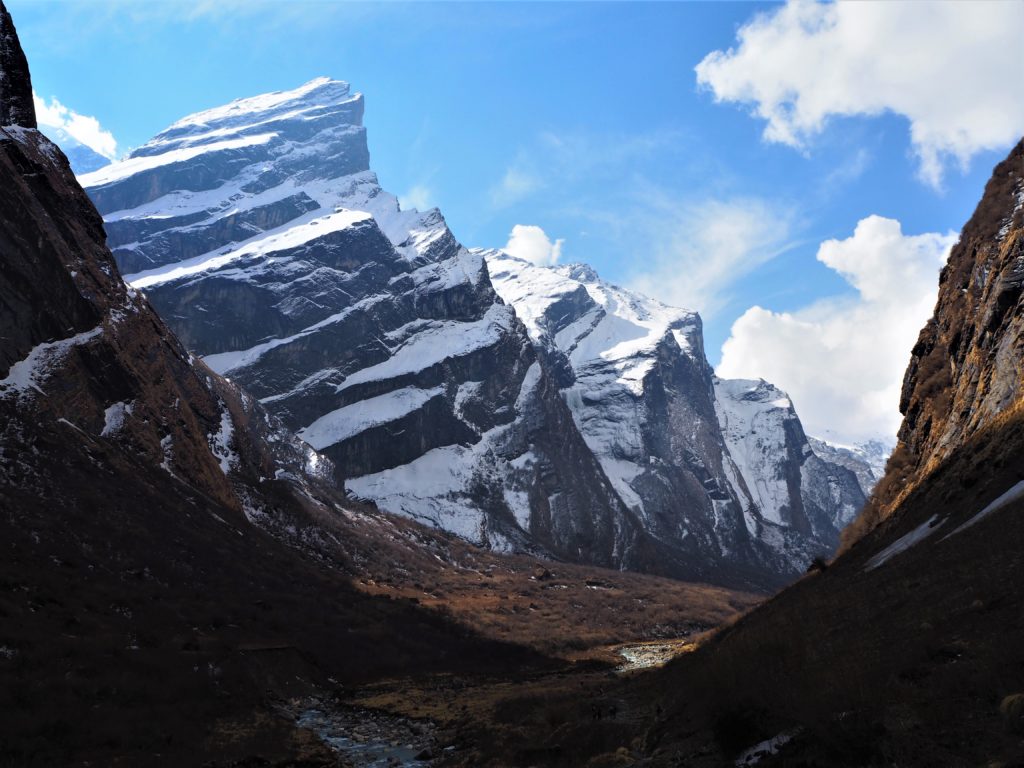
The Annapurna Base Camp or the Annapurna Sanctuary is a mountain refuge from where the ascends to the peak Annapurna I (south variant) and Annapurna South start. It is located 35 km north of Pokhara, a city in the centre of Nepal that is considered the gate to the Himalayas.
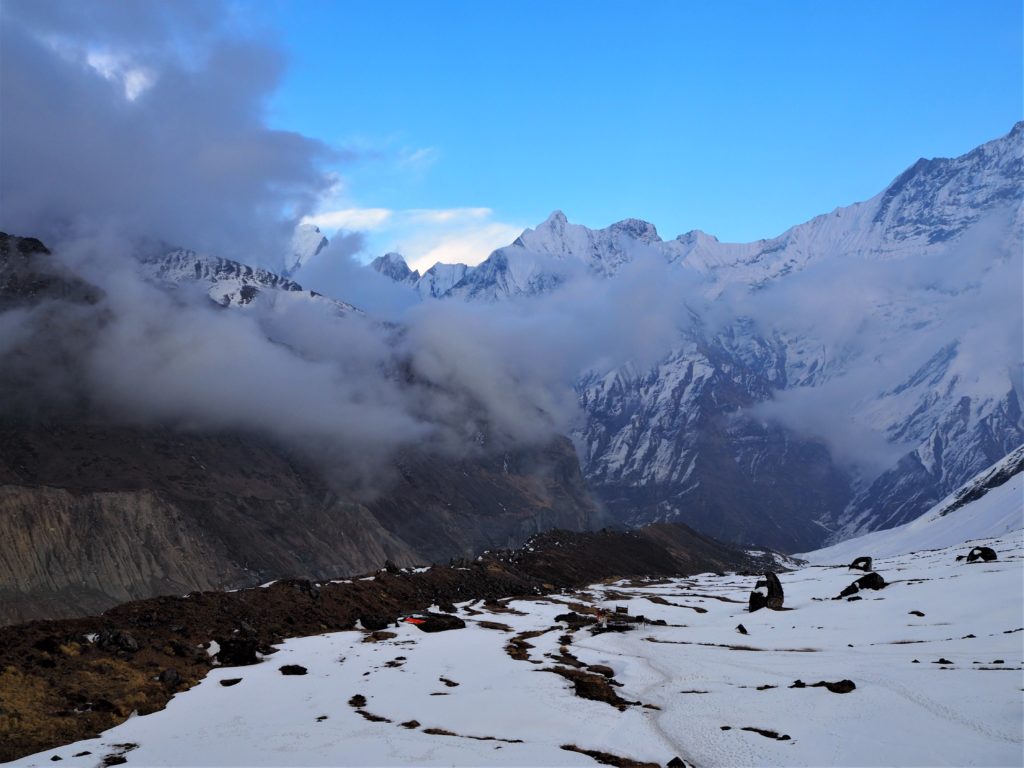
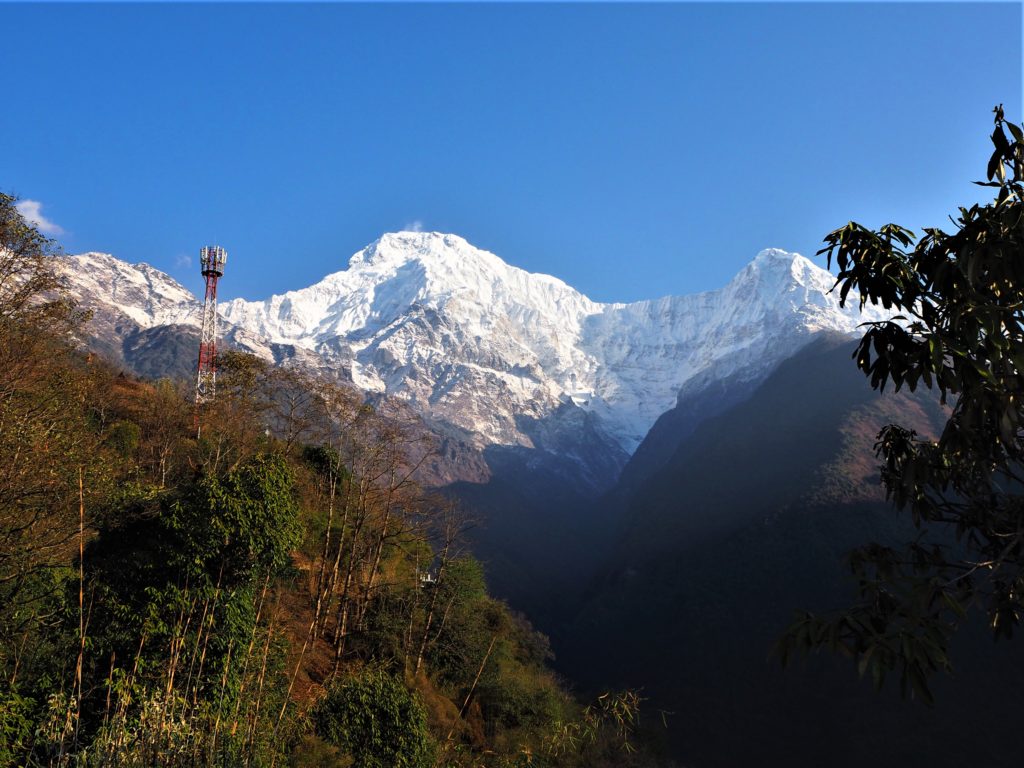
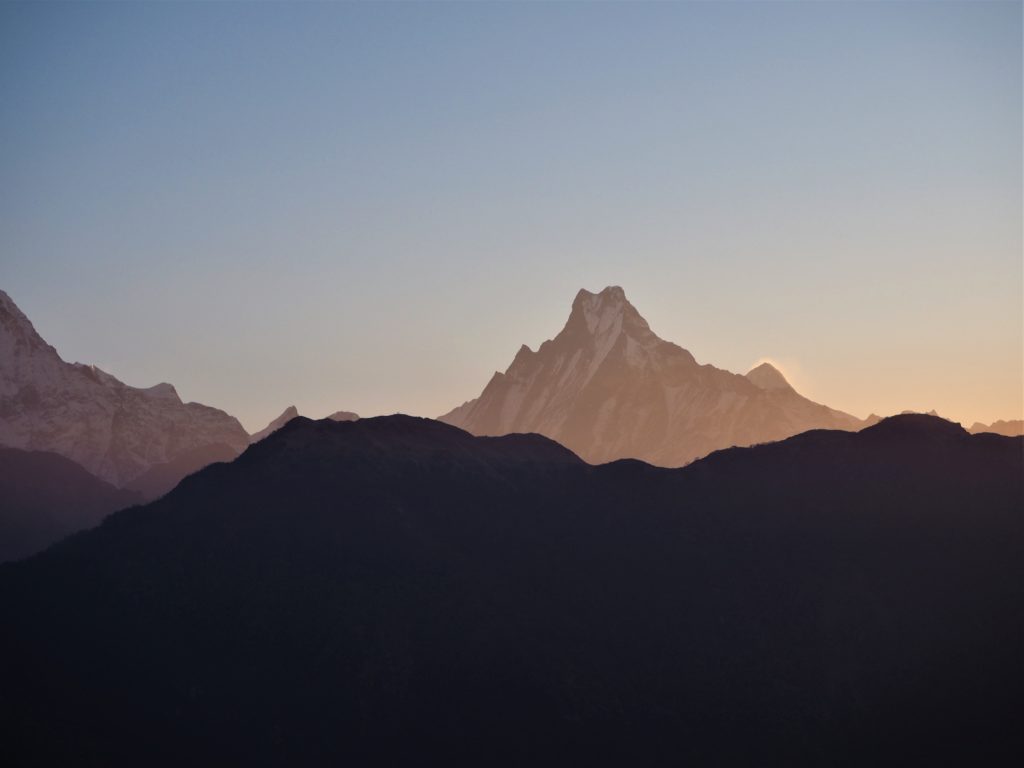
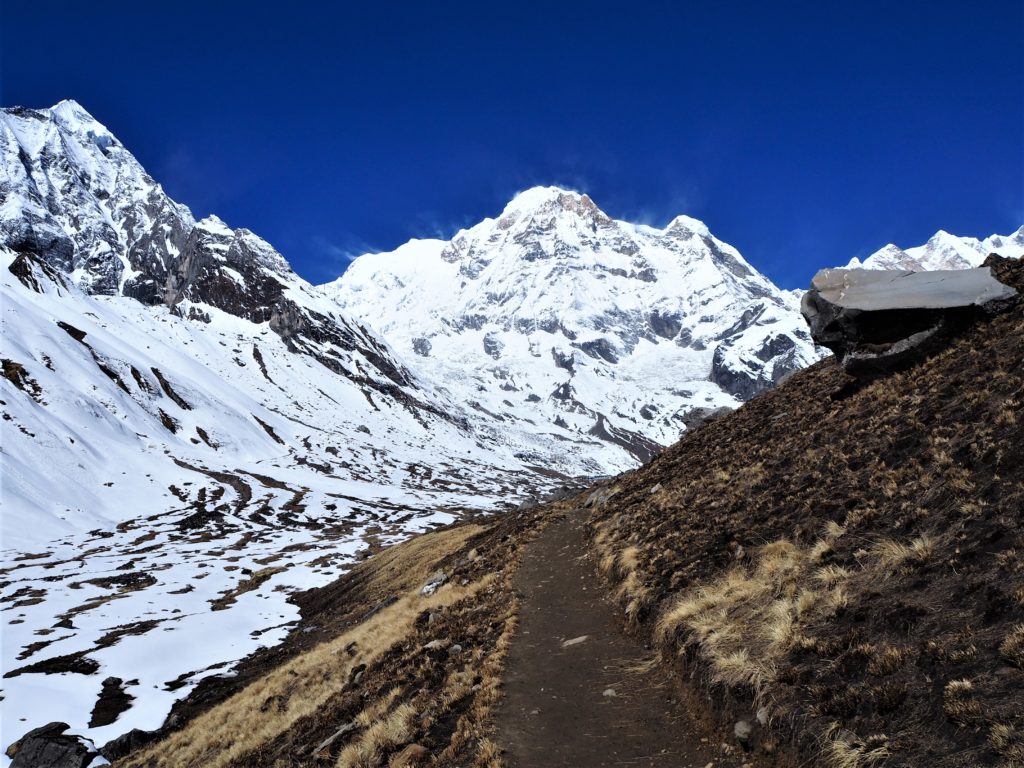
From the Annapurna Base Camp you have views over Annapurna I (8,091 m), Annapurna II (7,937 m), Annapurna III (7,555 m), Annapurna IV (7,525 m) and Annapurna South (7,219 m). All of them over the 7,000 m of elevation. Patal Hiunchuli (6,441 m) or Machapuchare (6,993 m) are other smaller peaks that can be appreciated from there.
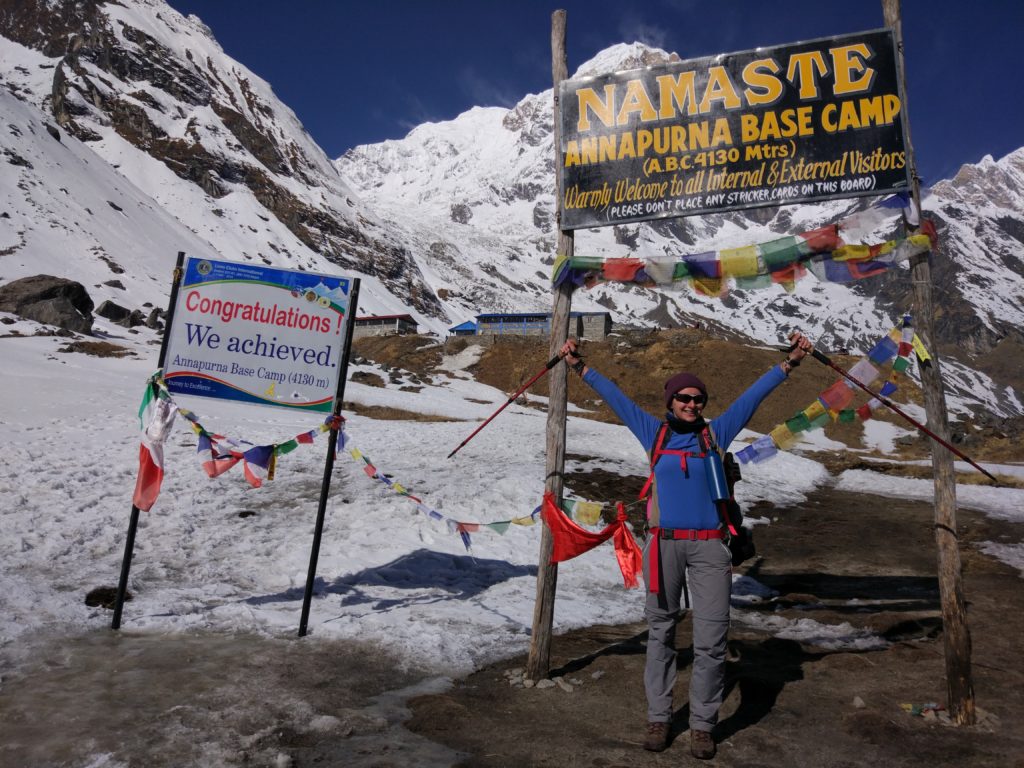
The trail that arrives there is known as the Annapurna Base Camp trek. It usually lasts for about 8 days and the starting point is Pokhara, reaching a maximum altitude of 4,130 m at the base camp.
The Annapurna Base Camp Trek is different from the Annapurna Circuit. In this one you will be walking in the Annapurna range but you will not arrive to the base camp. The maximum altitude you will reach is 5,300 m. It is a harder, longer and more popular trek than the Annapurna Base Camp one.
The total distance we walked was 81.9 km, with an elevation gain of roughly 5,255 m and an elevation loss of 5,405 m. Of course, these numbers will vary depending on the actual route you take.
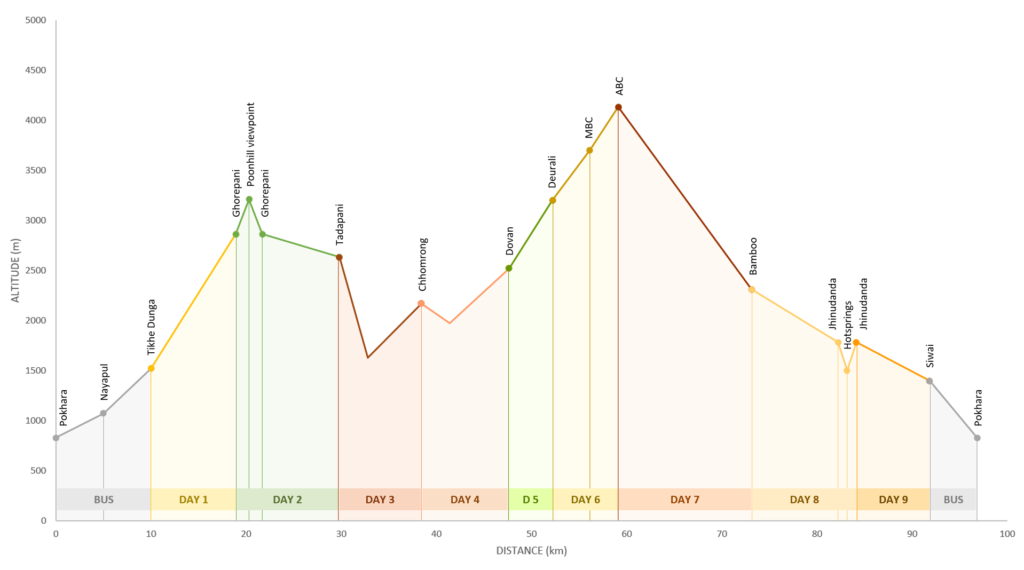
Note that the grey areas are the bus rides and are included just to have the complete picture, as distances provided there are not exact.
| START | END | DISTANCE ELEVATION | COST* | |
|---|---|---|---|---|
| DAY 1 | Tikhe Dhunga 1,520 m | Ghorepani 2,860 m | 8.9 km +1,340 m | Rs2,620 |
| DAY 2 | Ghorepani 2,860 m | Tadapani 2,630 m | 10.9 km with Poonhill +790 m -950 m | Rs1,250 |
| DAY 3 | Tadapani 2,630 m | Chhomrong 2,170 m | 8.6 km +600 m -1,000 m | Rs1,470 |
| DAY 4 | Chhomrong 2,170 m | Dovan 2,520 m | 9.2 km +550 m -200 m | Rs2,180 |
| DAY 5 | Dovan 2,520 m | Deurali 3,200 m | 4.6 km +595 m | Rs1,965 |
| DAY 6 | Deurali 3,200 m | ABC 4,130 m | 6.9 km +1,030 m | Rs2,860 |
| DAY 7 | ABC 4,130 m | Bamboo 2,310 m | 14 km -1,795 m | Rs2,045 |
| DAY 8 | Bamboo 2,310 m | Jhinudanda 1,780 m | 11 km with hotsprings +350 m -1,075 m | Rs2,375 |
| DAY 9 | Jhinudanda 1,780 m | Siwai 1,395 m | 7.7 km -385 m | Rs450 |
* These are my actual costs (one person).
1.2. The start and the end of the route
As you will appreciate in the map, from Chhomrong to the end of the route there is a single trail. In contrast, there are several alternatives to arrive from Pokhara to Chhomrong. As a result you will be able to decide how to start and finish the trek, mainly depending on what you want to do. For example, if you want to do the side trek to Poonhill viewpoint, you’ll know you’ll have to walk through Ghorepani. Similarly, if you want to visit the hotsprings at the end of the trek, you will need to pass through Jhinudanda.
How you start and finish can also shape the number of days you spend in the trek and the amount of km you walk.
You will need to leave from Pokhara, so, if you are at Kathmandu or some other city the first step would be to arrive there. Pokhara is a very beautiful and interesting city so I would encourage you to spend a few days there and visit Lakeside, World Peace Stupa or Sarangkot.
The start
The most common starting points are Nayapul and Phedi. Both can be accessed by bus from Pokhara. Usually trekkers start from one of these villages and finish the trek in the other. As you can see in the map, Nayapul allows you to go to / return from the Poonhill viewpont, and Phedi does so to Jhinudanda hotsprings.
Another less common alternative is Kande. It doesn’t show on the map, but it is located somewhere between Nayapul and Phedi and allows you to arrive to the Deurali between Ghorepani and Tadapani through ‘Australian Camp’ without passing through Ghorepani.
We knew we wanted to visit Poonhill viewpont in our way up. However, we decided for an alternative to Nayapul, which was taking an additional bus from Nayapul to Tikhe Dhunga. This meant that in our first day, we were able to arrive to Ghorepani although it was overall a long day, as we devoted the morning to the bus ride from Pokhara to Tikhe Dhunga and the afternoon walking to arrive to Ghorepani at 6pm.
We had two reasons for that. We knew that the trek from Nayapul to Tikhe Dhunga, particularly until Bire Thati, was an unpaved road that both trekkers and vehicles shared, with zero beauty. And we didn’t want to dedicate a full day to it.
A side note: see that I have mentioned the Deurali between Ghorepani and Tadapani? You will also see another Deurali later in the trek. This is interesting and somehow kind of frustrating: there are a lot of villages in Nepal sharing names, even when they are this close from one another. It can be quite confusing.
The end
Similarly, we knew we wanted to visit the Jhinudanda hotsprings. It meant that the trail from Chhomrong to Bire Thati passing through Ghandurk was not an alternative.
However, if we had followed the traditional option, we would had walked from Jhinudanda to Phedi in our last day (21 km, +800 m, -1,340 m) or to Nayapul (19 km, +310 m, -985 m). Or we would have needed to split it in two days.
We weren’t really eager to spend an additional day in the trekking (we were exhausted). Nor to walk 20 km (we were exhausted!). So again, we decided for a less known alternative and took a bus to Pokhara from Siwai bus park. This meant walking only about 8 km.
The bus ride was truly awful because the road was horrible, but we did not regret this decision.
If we hadn’t gone to the hotsprings at Jhinudanda, another alternative would had been to go to Kimche bus park.
1.3. Side trek to Poonhill
Poonhill is a viewpoint located at 3,210 m and just 1.4 km from Ghorepani. As you will see bellow, there is a shorter trekking route which takes you to this viewpoint. However, it can also be incorporated to the Annapurna Base Camp trek, either if you go with a guide or don’t.
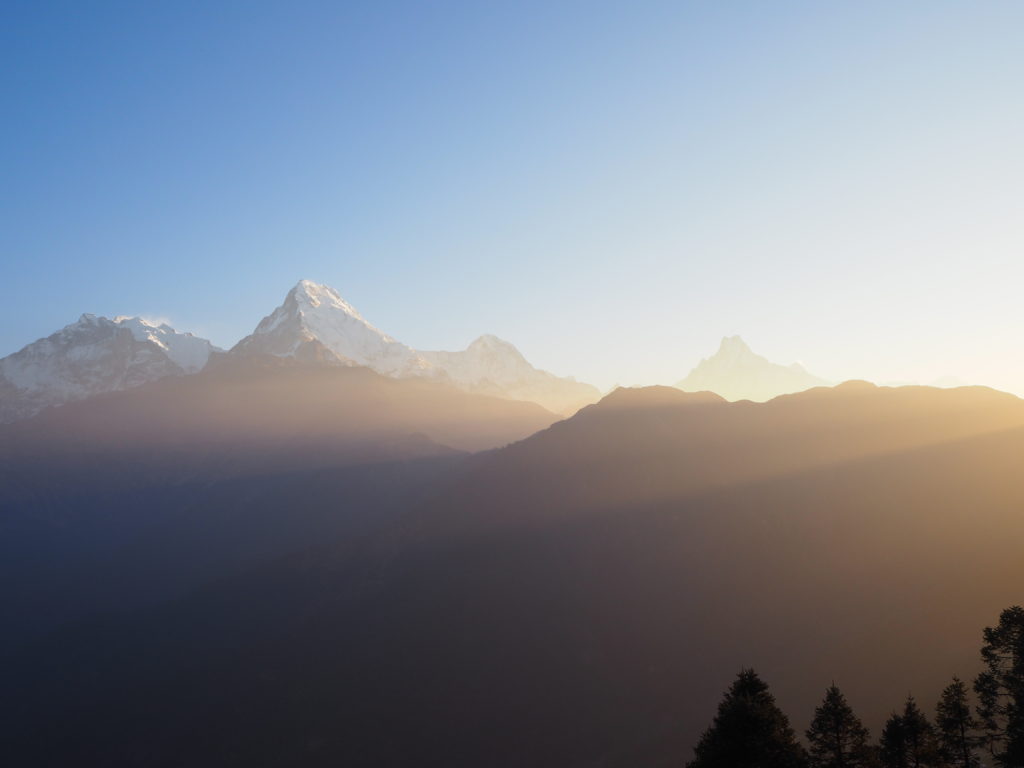
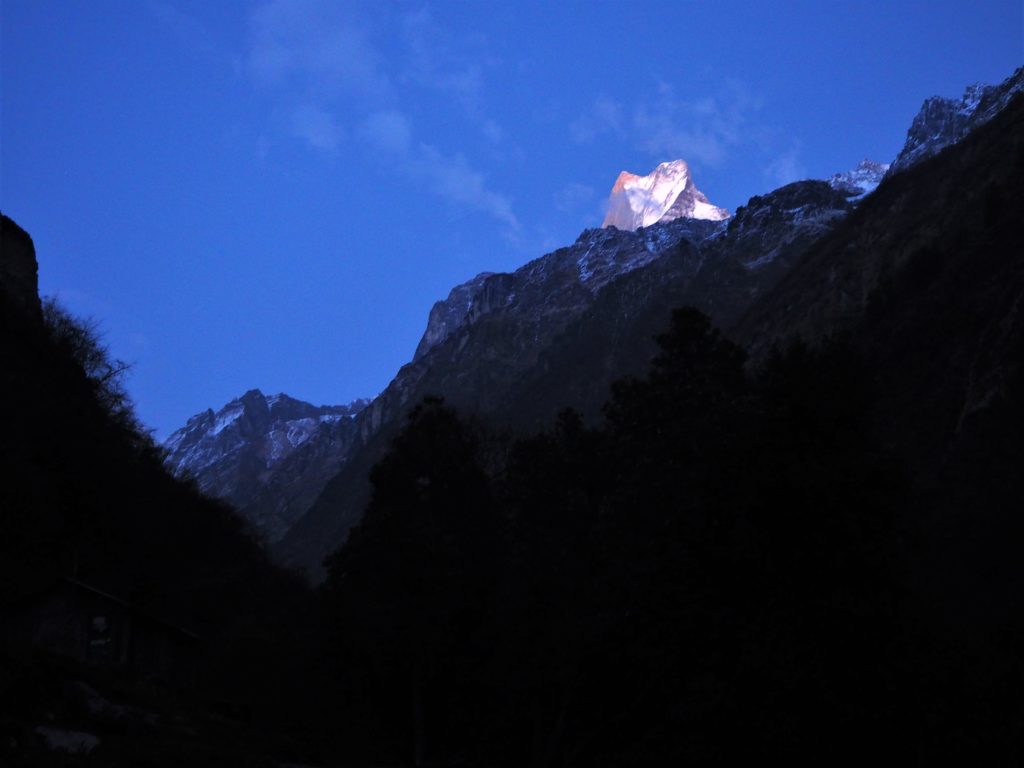
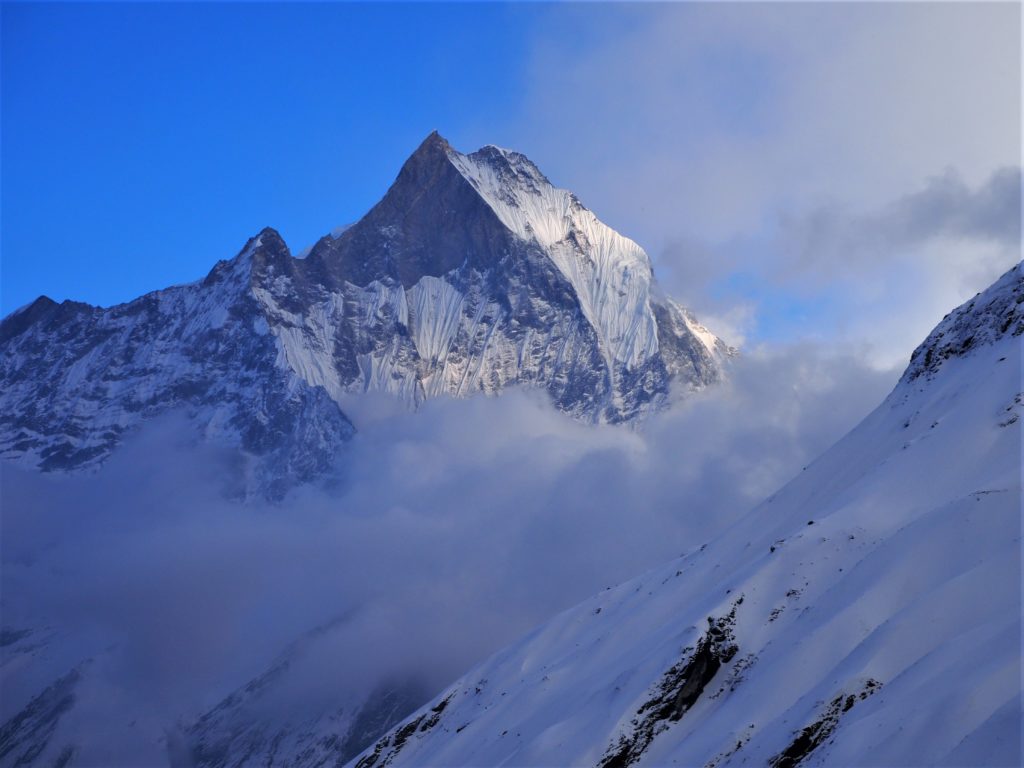
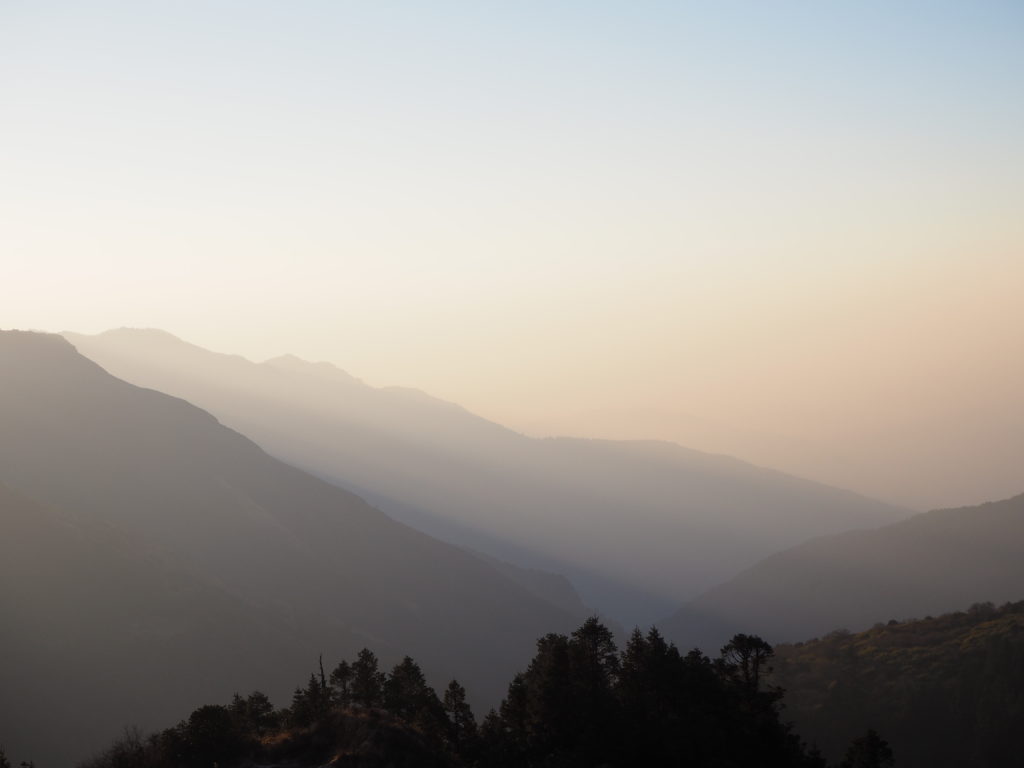
From Poonhill you will be able to observe the Annapurna range in all its splendor. Despite it is beautiful at all times, during sunrise it is particularly stunning.
If you want to go at sunrise it would mean waking up really early. And maybe start walking when it is still dark. For this reason I would highly recommend to spend the night at Ghorepani, which is the closest village. From there to Poonhill you have 45 minutes of trek. You do not need to leave so early before sunrise, so you will probably not be walking in the dark.
If you don’t mind not seeing the sunrise from Poonhill (which you should), your timing will not be as conditioned. You can still spend the night at Ghorepani and enjoy a long-night sleep. Or you can stay in Ulleri or even visit the viewpoint after arriving to Ghorepani from Tikhe Dhunga. This latter would be providing you spend the night at Tikhe Dhunga and start walking in the morning, which is something we didn’t do.
Even if you are a night owl, I would really really encourage you to visit Poonhill at sunrise. The main reason for that is that the spectacle is beyond imaginable. It is to this day the most beautiful sunrise I have ever seen. Also, statistically speaking, the later you go, the more likely you are to find the Annapurnas hiding behind some clouds.
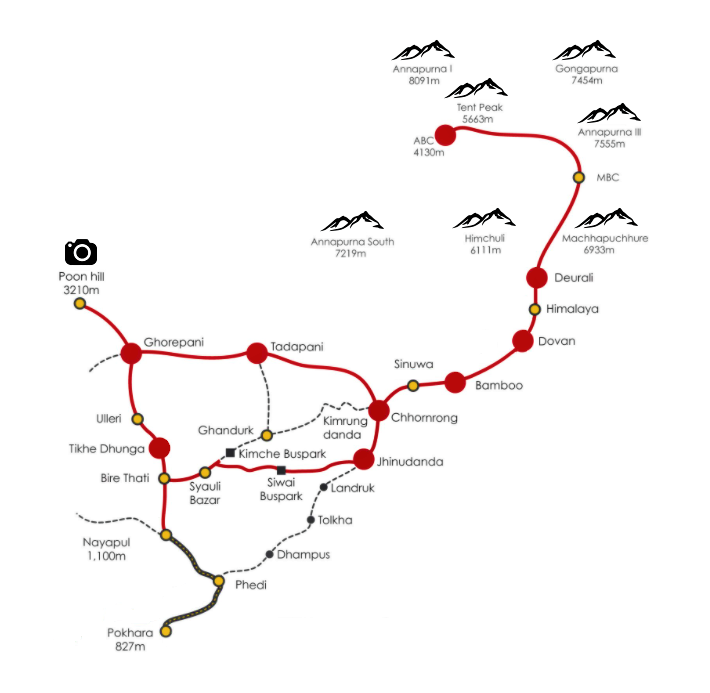
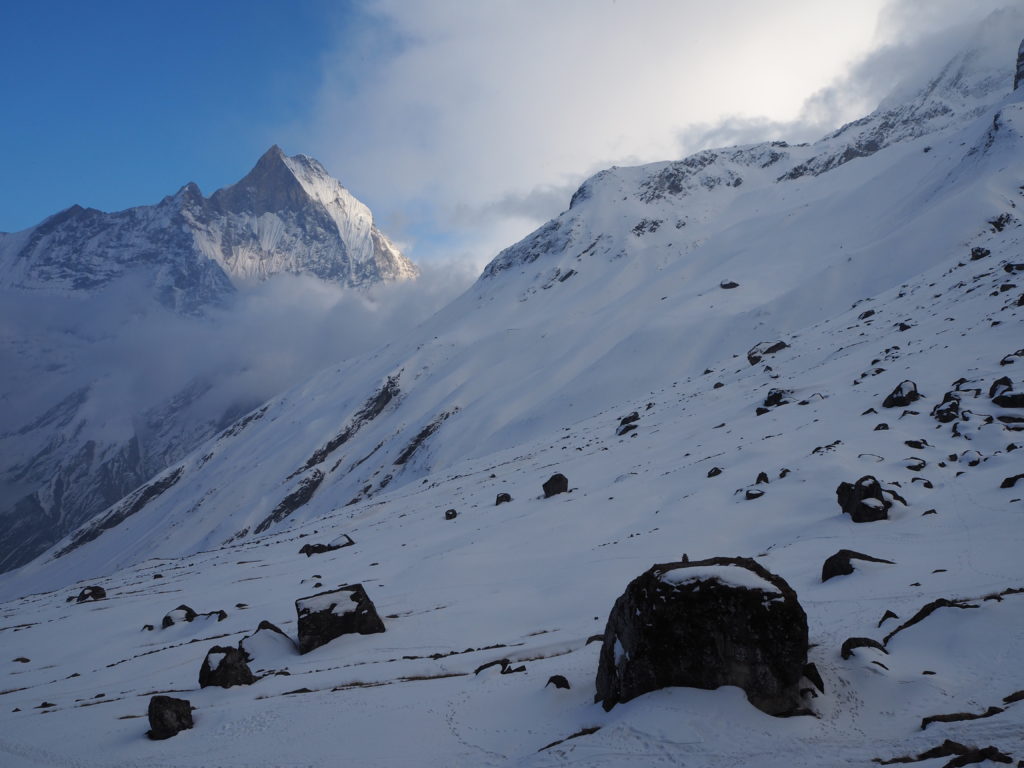
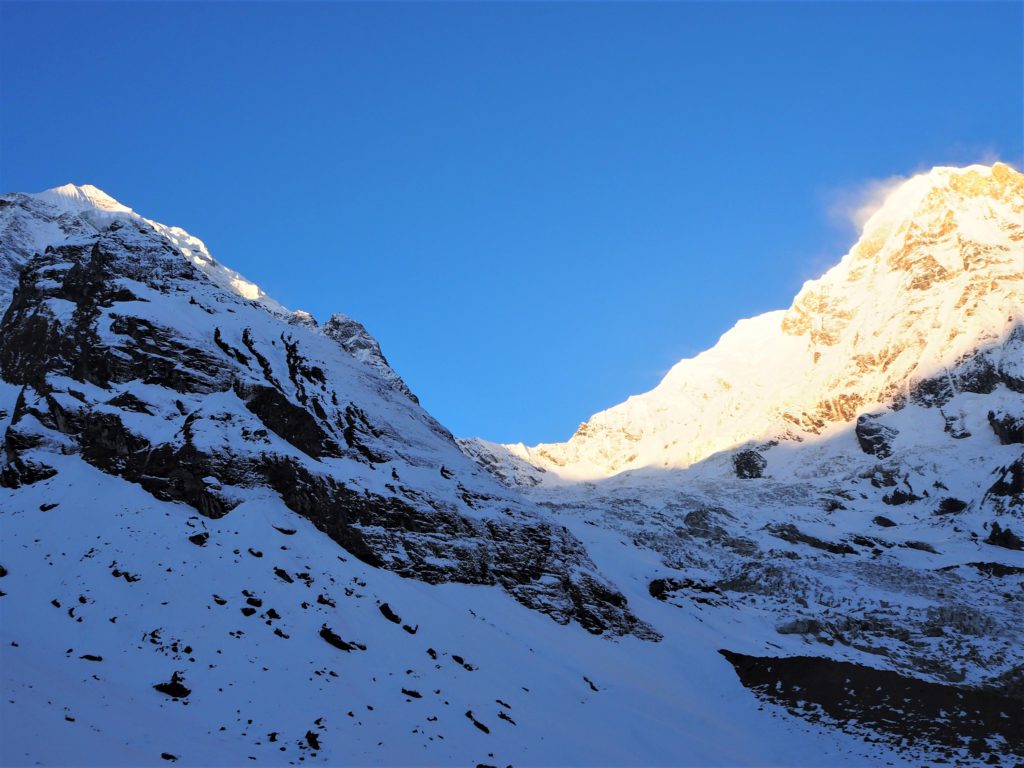
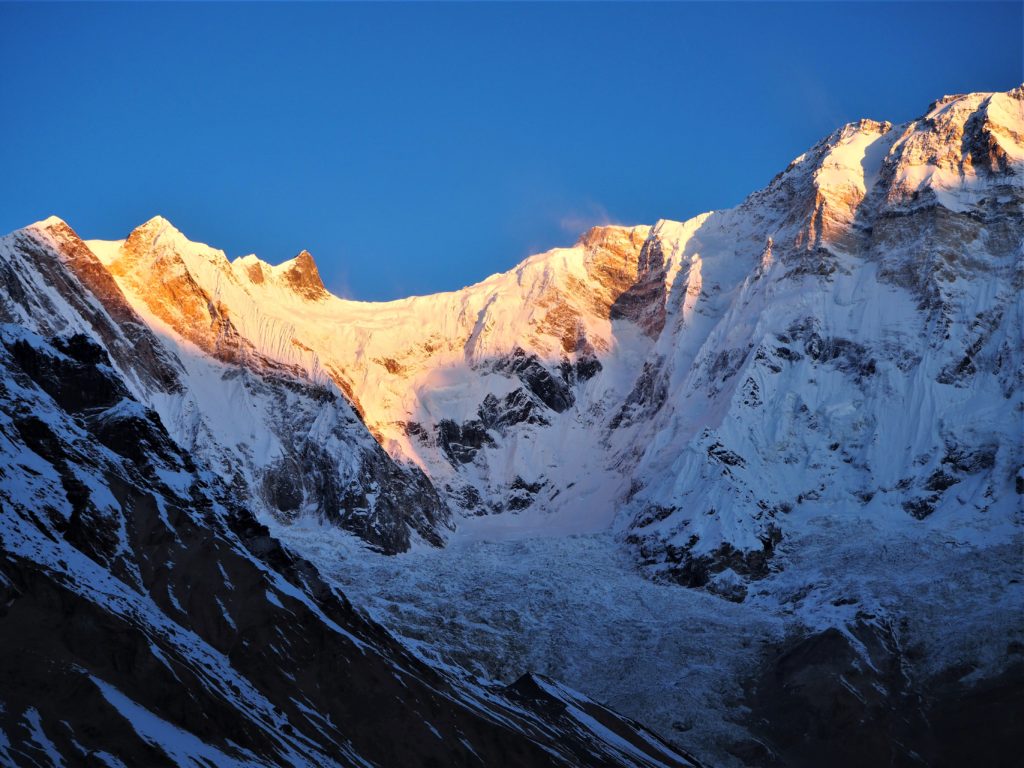
1.4. Stars and sunrise over the Himalayas at Annapurna Base Camp
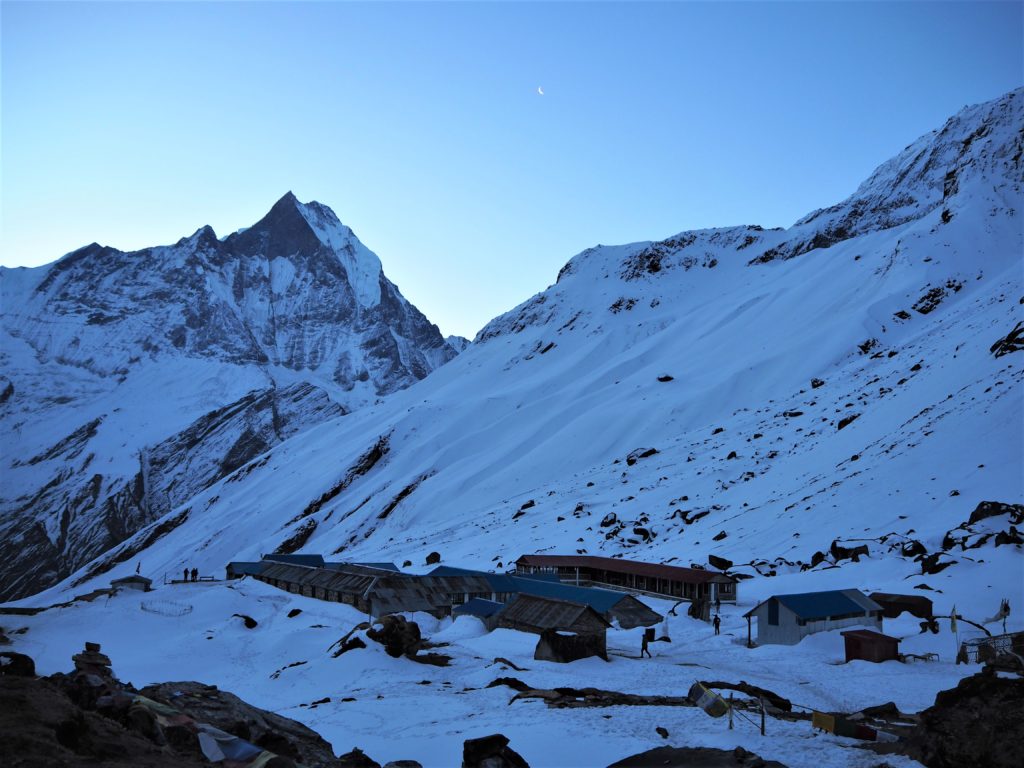
Seeing the starry sky at night in the Annapurna Base Camp is another of the top experiences in this trek. As is seeing the sunrise paint the Annapurna range in orange. However, it does come with a price as to do so, you’ll need to sleep in the base camp, at 4,135 m high, with the consequent risk of having a restless night due to altitude sickness or to experience other of its pleasant symptoms. It will of course also be colder than staying at Machapuchare Base Camp, the most common alternative.
We decided that, despite of the cold (we were trekking on early March) we wanted to sleep in the Annapurna Base Camp and see the stars and sunrise. We woke up at 4.30 am and were alone there until way later. Other people only started to come to see the sunrise.
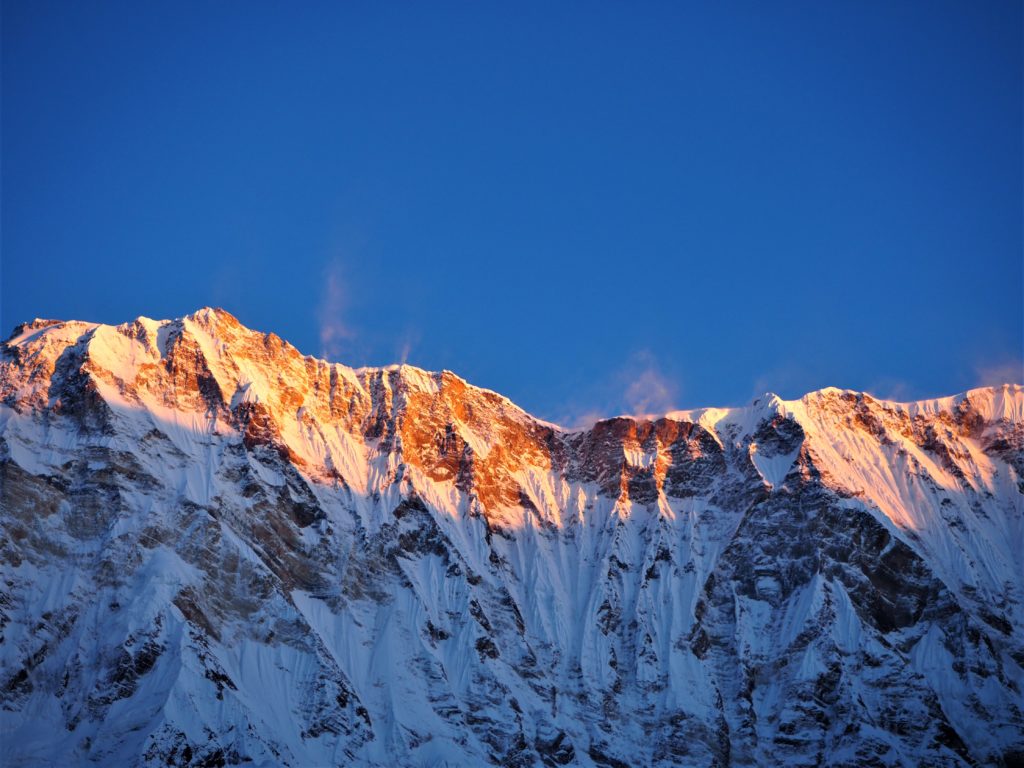
I have to say, I did find the sunrise from Poonhill more vivid. However, this one from the Annapurna Base Camp was more special because it was harder to achieve.
I’m not sure if I would personally recommend that (I mean, I would now, some time later, when I remember better the views than how miserable I felt while I was there). The rest of the group probably would, but I was suffering from altitude sickness since the day before. Also I was so very cold.
1.5. The hotsprings at Jhinudanda
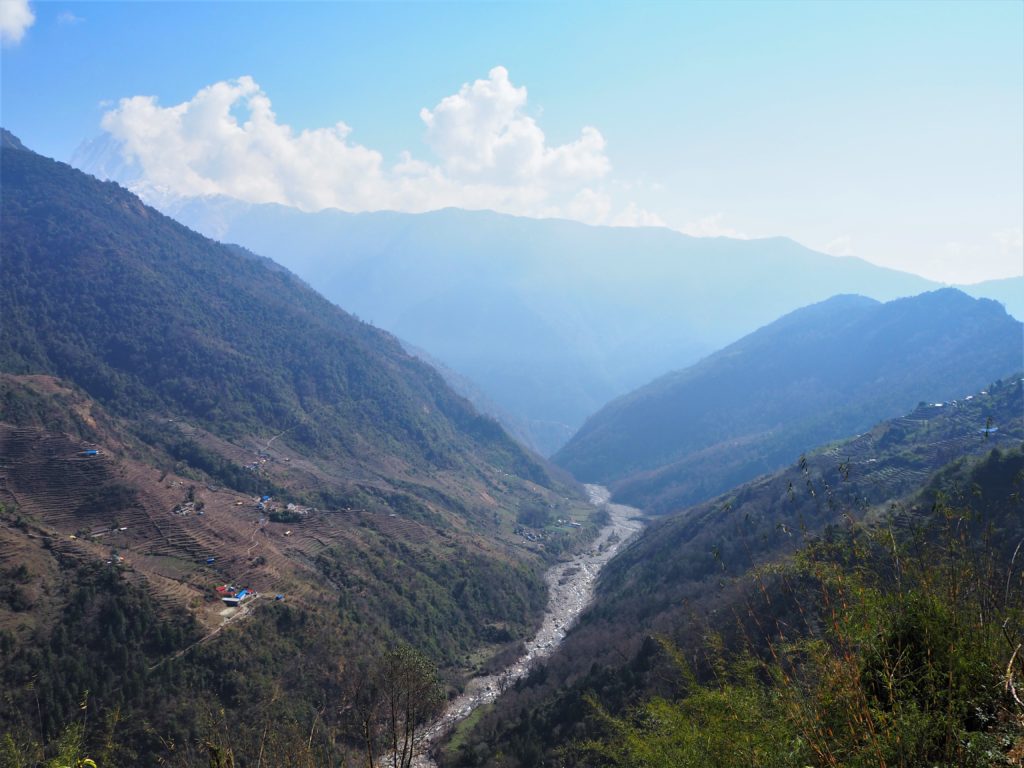
The village of Jhinudanda is mainly regarded for its natural hotsprings. They are located in the river Modi Khola, some 30 minutes downhill from the village.
The hotsprings consist of human-made pools enjoyed both by tourists and Nepalese, particularly guides and porters. It is very common for visitors to alternate the pleasant warm water from the hotsprings with the icy water of the river. This will of course depend on season and river current: do watch if it is too strong or too high for you to submerge safely.
The visit to the hotsprings at Jhinudanda is usually how you would finish the Annapurna Base Camp trek. As I mentioned before, an alternative if you don’t fancy it would be to finish the trek through Ghandurk. This option would allow you to take a bus to Pokhara from Kimche bus park, or otherwise continue walking to Nayapul.
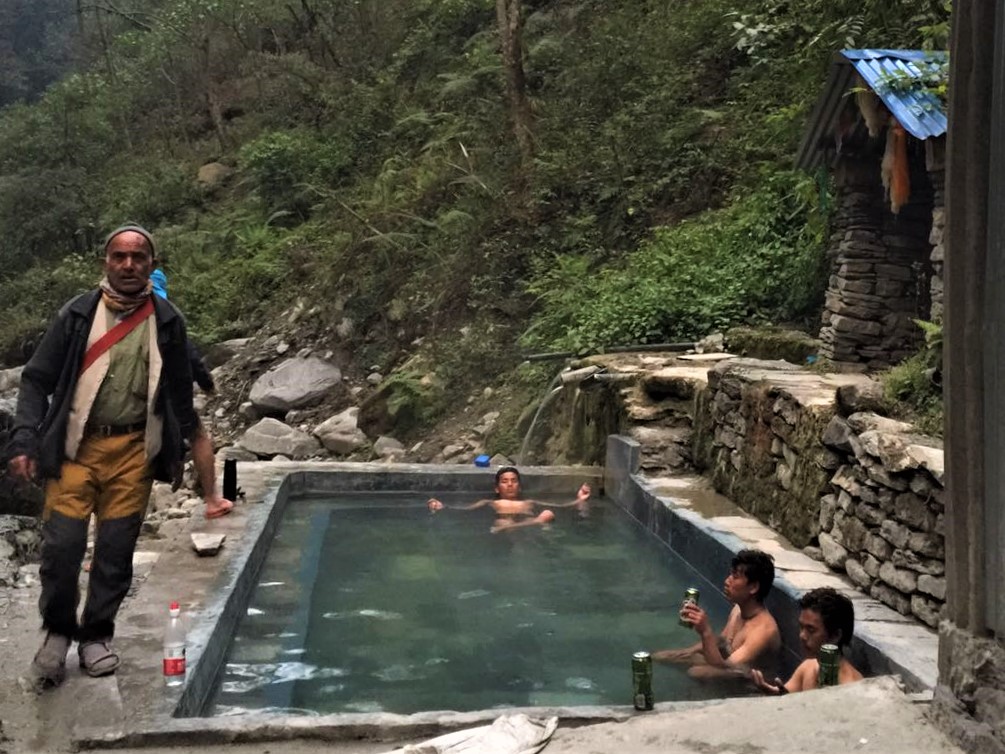
In my opinion, the hotsprings at Jhinudanda are a sweet way to end this adventure. Believe me, when you have been walking for over a week in the high altitude and demanding terrain of the Himalayas, your muscles will appreciate that you treat them with love. Also (although this might depend on season) you will probably be tired of spending the afternoons and evenings in freezing living rooms. The warm water will be a very welcomed alternative.
1.6. Alternatives: the Annapurna Circuit and other trekking routes in the area
The Annapurna Base Camp trek is located in the Annapurna Conservation Area. It is Nepal’s largest protected area covering 7,629 km2 in the Annapurna range of the Himalayas. It was established in 1985.
Appart from the Annapurna Base Camp trek, the area has many other trekking routes which you can do with or without a guide. Note that many of these treks can be combined as we did with Annapurna Base Camp and Poonhil. Some other common combinations are Annapurna Circuit + Poonhill, or Mardi Himal + Annapurna Base Camp.
Remember that Annapurna Sancturary is another name for the Annapurna Base Camp trek.
Annapurna Circuit (13-20 days)
It’s the longest most common trek to do in the area. The number of days you will walk will be highly dependant on your physical form and how you distribute the days and distances, but also on where you finish the trek. Usually Annapurna Circuit starts from Besisahar, which you can access by bus from Pokhara. Its main highlights are Tilicho lake at 4,919 m, the highest in Nepal and one of the highests in the whole world, and Thorong La pass at 5,416 m, the highest and hardest spot of the trek. Once you have passed Tilicho lake and Thorong La pass, you will reach Jomson. There are daily flights from Jomson to Pokhara so you can finish your trek there or alternatively continue to Poonhill and finish the trek at Nayapul.
Poonhill (3-5 days)
There is a lot of information on this post about the Poonhill viewpoint trek, which we combined with the Annapurna Base Camp trek. Its starting point is Nayapul and usually finishes there too. The highlight is of course the Poonhill viewpoint, but you will be able to pass through traditional Nepalese villages and beautiful landscapes.
Mardi Himal (4-6 days)
Located very close to the Annapurna Base Camp trek, Mardi Himal trek arrives to the base camp of Mardi Himal at 4,500 m. It is slightly more challenging than the Annapurna Base Camp. Also, it’s less popular and therefore less crowded but equally beautiful.
1.7. The weather
There are four seasons for trekking in Nepal:
- From september to november: it’s generally regarded as the best season for trekking. Monsoon is usually over and the temperature is still mild and pleasant. Most trekkers choose this season so if you do too, you will surely have company.
- From december to february: winter and therefore the coldest season. You can expect snow and its challenges. I would personally not recommend winter for trekking as most villages don’t have heat in the guesthouses and it’s really freezing. However, if you happen to be in Nepal then and want to visit the Himalayas, maybe the Poonhill trek (which is not as high) is a good option.
- From march to may: the second best season for trekking. Temperatures start to moderate but still the monsoon has not arrived. Flowers start to blossom and the landscapes fill with birds and animals.
- From june to august: monsoon season and therefore the worst for trekking. The chances of rain are very high, so you can expect zero views of the mountains because of clouds. Also, the trails will be muddy and more difficult to walk, with plenty of leeches. Access to the starting point by road will also be more dangerous.
In a more general note, do consider that the weather in the high mountains is very variable. Independently of the season, you may expect clouds and rain, particularly after noon. Mornings tend to be more stable.
Take also into account that you will reach a maximum altitude of 4,135 m. You will be walking over 2,500 m most days, so tempreratures, specially at night, can be cold even in hottest seasons.
1.8. Guide or no guide for the Annapurna Base Camp trek
I think that both options have several pros and cons, so I would say that it is a very personal decision.
If you plan to do the Annapurna Base Camp trek on a budget it is definitely better to go without a guide or porter, as it can substantially increase the cost of the experience. On the other hand it is a great way to contribute to local economy and for the people of this area to make a living, which is probably what I like the most about the idea of hiring this help.
The guide
Going on your own would mean you arranging accomodation and food each day and also navigating the trail by yourself, which is something a guide would take care for. It is anyway extremely easy to do. My opinion is that it is very difficult to get lost in the Annapurna Base Camp trek as the trail is clear and there are several other trekkers along the way, however, you do need to feel comfortable in the mountains.
A guide will also be able to provide you with lots of information and curiosities that would otherwise be difficult to come by. Having a guide will undoubtedly make your trek to the Annapurna Base Camp easier, which for me personally would be a con because the feeling of achievement would not be as high as when being there by yourself and your fellow trekkers.
The porter
Regarding a porter, I feel that it is a little bit more controversial. Know that it will consist on a person carrying your backpack, not a mule, and that one porter usually carries two people’s luggage. Guides are better esteemed and regarded in Nepal (and everywhere) than porters, so hiring a porter is cheaper than a guide and they may not be as well equipped.
Having a porter carrying your heaviest items will make the trek easier for you, which is great, but please do not think of this as the way for you to bring more than just the essentials. Be considerate and pack smart, even if you are not the one suffering the consequences of carrying useless stuff. Someone will.
Some tips to hire the right guide/porter
- Do not book it from home. It will only increase the cost as you will probably need to pay for an additional intermediary and for the credit card commission.
- There are a thousand million travel agencies available in Pokhara, Kathmandu, or really any city in Nepal. All of them can organise your trek. Invest a little time in exploring the conditions in a few of them, ask all the questions you may have. Book with the one that convinces you the most.
- Don’t be afraid to not find a place. You will! A lot of groups leave each day. Also, they can operate on short notice, so even if you book late in the afternoon you would be able to leave the very next morning.
2. Preparing the Annapurna Base Camp trek without a guide
2.1. Budgeting your trek
In this section you will find general information on the costs for the trekking experience. This is mainly extracted for Nepali travel guides that I studied when I was preparing to trek to the Annapurna Base Camp without a guide. However, later in the post I also detail the specific amounts I payed for everything each day of the trek.
A/ Food and accomodation
It ranges from Rs1,500-2,000 per day. Women usually are in the lower range while men can spend up to Rs2,500. This will largely depend on the amount and type of food you eat, but also your ability to negotiate or the size of the group (largest groups get better prices).
- Accomodation: Rs100-200 per person, if you eat where you sleep. If you don’t (because you have your own food, for example) accomodation can cost up to Rs1,000. The reason for this is that their main income comes from the restaurant.
- Food: standardised prices through the village. You will always have a choice of foods, however, if you order dal bhat, you can refill your plate as many times as you want.
B/ Extras along the trek
- Hot shower: Rs100-200 if available.
- Wifi: expensive for bad connection.
- Battery recharge: Rs100-200, although free in some places.
- Tips: for guides/porters and guesthouses. A 10% tip is well appreciated in Nepal.
- Emergencies.
C/ Transport
You have several options to arrive from Pokhara to different starting points of the Annapurna Base Camp trek:
- By bus: leaving from Baglung Bus Park, Pokhara. Departing every hour every day from 6am to 3pm.
- Pedi: Rs150
- Kande: Rs250
- Nayapul: Rs300
- By taxi: from Pokhara Lakeside. These costs are approximates:
- Pedi: Rs1,000
- Kande: Rs1,500
- Nayapul: Rs1,800-2,000
- By minivan or jeep: a good option for large groups. You can book them from travel and trekking agencies.
You may also hear about the bus station at Prithivi Chowk Bus Park. However, this one will take you from Pokhara to Besisahar, which is the starting point of the Annapurna Circuit. The cost for this trip is Rs250. Departure of two buses every day at 6am.
D/ Permits
You will need two different permits for the Annapurna Base Camp trek: the Annapurna Conservation Area Permit (ACAP) and the Trekker’s Information Management System (TIMS) Card.
- Annapurna Conservation Area Permit: Rs2,000. You will need two passport photos.
- Trekker’s Information Management System Card: there are two cards available, the blue and the green one. The blue one is for trekkers with a guide. It costs USD10 and you need one passport photo. However, you’ll need the green one if you do the Annapurna Base Camp Trek without a guide. It will cost USD20 plus two passport photos.
Both these permits can be purchased at the Trekking Office in Pokhara, located in the Tourist Information Centre in Damside. Opened daily. In Kathmandu, they can be purchased at the Nepal Tourism Board.
E/ Guides and porters
A guide costs between USD20-30 per day. The higher your trek goes, the higher the cost of the guide. Porters cost between USD10-20 per day and one can usually carry two people’s bags. If you hire porters, please ensure they have adequate clothing and shoes for the trek and prepare your backpack with the essentials only. Even if you are not the one carrying your things, someone has to, so why not make their work easier?
You will not need to pay accomodation and food for the guide or porter, as these are included in their general fee.
F/ Where to get the money from
There are no ATMs or money exchange during the trek, neither can you pay by credit card, so you should withdraw everything you think you’ll need at Pokhara.
In general, ATMs allow withdrawals of Rs15,000, with a Rs500 ATM fee (plus your bank’s fee). There are some exceptions:
- At Standard Chartered Bank ATMs you can withdraw Rs35,000 with no ATM fee (only your bank’s).
- At Nabil Bank you can withdraw Rs35,000 with Rs500 ATM fee (plus your bank’s).
2.2. Water, food and snacks
In Pokhara, there are some shops, offices and caffes that allow you to refill your reusable bottle for Rs10 per litre. It is the same bottled water you could buy individually, only it is purchased in larger containers so it is cheaper and more environmentally friendly.
During the trek you will also have refills available, although the cost and source will vary. You can also purchase plastic bottles during the trek but this is an awful option and I hope you only consider it in case of emergency (if you lose your reusable bottle and need a replacement).
However, the best option are always water purification pills or a water purification bottle. These can be bought at Lakeside Pokhara.
As of food, as I previously said, you are supposed to eat where you sleep, so that will cover your main meals. Regarding snacks, you will find chocolates available during the trek that will make excellent treats, but not real snacks such as fruit, nuts or muesli bars, so if you want them, buy them at Pokhara.
It is also worth noting that from a little before reaching Dovan, for religious reasons, meat is not allowed. This will mean that you will not find it in menus, but also that if you are carrying your own food, it is expected that it is also vegetarian. Sanctions may apply.
2.3. Altitude sickness and how to minimse it
Altitude sickness is also known as acute mountain sickness (AMS), and it’s a health disorder that presents at high altitude, usually from 2,400 m (8,000 ft). The main symptoms of AMS are headache, nausea and other gastrointestinal disorders, fatigue, dizziness, insomnia, swelling extremities or face and rapid pulse. Other more serious complications may also occur and I strongly recommend you to read about them from reliable sources. In this link, you have an example of a reliable source, but check your own!
The main recommendation you will find to minimise altitude sickness is to drink plenty of water and to gain altitude progressively (which you will be doing in the Annapurna Base Camp trek).
Everyone’s body reacts different to altitude sickness. Also, from my (very limited) experience, I can say that being physically fit doesn’t mean you will not have any problem with AMS or that your symptoms would be mild.
As everyone reacts different, it is key that you know how you will react. This will be useful mainly to eliminate the stress of not knowing what you may feel and being prepared for what you would actually feel (for example, having pills for a possible headache). So at this moment that you are preparing for this trek, go for a walk in that high mountain you always wanted to visit!
I can’t stress enough that having a good track is one of the most important things of the whole planning, particularly if you will be doing the Annapurna Base Camp trek without a guide. What I find more useful and I think is key if you want to trek an unknown path is to have a topographic map and a compass. Luckily for us technology can complement these items and now we have Apps on our phones that can provide this information.
If you don’t already have a map viewer I would recommend you Oruxmaps, which is the one that I use. You can get the free version only in their website, as you have to pay for the version available in Google Play Store or Apple’s App Store. Although they could improve its ‘user-friendly’-ness (uploading maps can be a little tricky), it has features that I find essential, the ones you should ask your map viewer to have:
- Working both online and offline
- Huge databases from where you can download tracks
- Compass
- Altimeter
- Sharing your position
- Creating and saving your tracks
The premium version of Wikiloc, which costs about 10€ per year, is also a great option. We also like Maps.me and Mapy.cz. They have a lot of mountain trails and can tell you the distance from one point to the next one, as well as the elevation gained/lost.
2.5. Am I prepared for the Annapurna Base Camp trek without a guide?
I’m glad you asked! However, you are the only one who can answer this question. I would say that the most relevant things you need to consider to assess if you are prepared or not for this trekking are the distance you will be walking each day, the elevation, the type of terrain and potential altitude sickness.
So, before deciding if you can safely handle the Annapurna Base Camp trek without a guide, take a moment to think about it. Think about your previous experiences, your level of fitness and your familiarity with the mountains. I am advocating for doing the trek on your own if this is what you want, as I always try to do, but this does not mean that everyone is prepared to do so and we should be honest regarding our capabilities to avoid finding ourselves in a situation we are not prepared for.
That being said, there are several things you can do to help, both during and before the trek:
- Carry a light backpack (see below a list of what your backpack should contain).
- Be prepared for changing weather, it is very common in the Himalayas.
- Try to experience altitude sickness before the trek.
- Train, train, train! I would recommend to train mostly endurance.
- Read everything you can find regarding this trek. Ask anyone you can ask about their experience at Annapurna Base Camp and similar treks!
2.6. Your backpack
Clothing
- Adequate clothes (depending on the season and weather). Try to pack smart and think what you need to wear fresh each day and what you can reuse.
- Thermal clothing, because you will absolutely need them for sleeping and for the highest parts of the trek. Include a hat, warm buff and gloves. You will only have heat at guesthouses at the lower locations of the trek.
- Impermeable pants.
- Impermeable windshield warm jacket, if possible, with a hood.
- Good hiking boots.
- Clean dry socks for every day of the trek (you can clean during the trek, but they’ll need time to dry).
- Swimsuit or similar (for Jhinudanda).
Water and food
- Water purification pills or water purification bottle.
- Snacks (fruits and nuts, maybe some chocolate to treat yourself after completing the most demanding parts of the trekking).
Others
- Trekking poles.
- Sleeping bag.
- Mobile charger and power bank.
- Adapter.
- Toiletries (including toilet paper).
- Towel and soap.
- Laundry power.
- Flip flops.
- Sunscreen.
- Sunglasses.
- Frontal light or a torch.
- Topographic map and compass.
- Strips and iodine, for blisters.
- Moisturising cream, in order to apply it to your feet and massage after each day of trekking. It does wonders to your muscles!
- Some medicine for headache, in case the altitude sickness hits you.
- Permits and passport.
- Pocket money, as credit cards don’t work there.
- Comfortable backpack of the right size. I wouldn’t recommend anything bigger than 40L. Impermeable bag to protect the backpack.
3. The cost of the Annapurna Base Camp trek without a guide
Previously in the post I shared some numbers on how to budget your trek in the Annapurna Base Camp without a guide. That content is based on information I read mainly on Nepali travel guides when I was there and therefore can be generally appliccable to everyone.
However, I also want to share the breakdown of the costs I had during the trekking, along with some indications on how to sort this data:
- Accomodation: as I previously said, it depends on your capacity to bargain, having the size of your group a great influence there. Also these costs assume you will be eating your meals in the same guesthouse where you sleep.
- Food: all our group spent more than the average of Rs1,500-2,000 that we were expecting. However, not once we ate Dal Baht (which is the cheap alternative) and in general were deciding what to eat depending on what we fancied, not its cost. Also, you will see great variability on the cost of food among some days and others: this is mainly influenced by having lunch that day or not.
- Snacks: we basically bought them the first day of the trek and carried them with us.
- Shower, electricity and WiFi: there is not much room for bargaining here, however at some guesthouses this items are free.
- Transport: we moved by bus.
| One person (Rs) | DAY 1 | DAY 2 | DAY 3 | DAY 4 | DAY 5 |
|---|---|---|---|---|---|
| Accomodation | 50 | - | 100 | 100 | - |
| Food | 1,470 | 1,100 | 1,370 | 1,780 | 1,465 |
| Snacks | 600 | - | - | - | - |
| Shower | 100 | 150 | - | - | - |
| Electricity | - | - | - | - | 200 |
| WiFi | - | - | - | 300 | 300 |
| Transport | 400 | - | - | - | - |
| TOTAL | 2,620 | 1,250 | 1,470 | 2,180 | 1,965 |
| One person (Rs) | DAY 6 | DAY 7 | DAY 8 | DAY 9 | TOTAL |
|---|---|---|---|---|---|
| Accomodation | 150 | - | - | - | 400 |
| Food | 2,510 | 2,045 | 2,195 | - | 13,935 |
| Snacks | - | - | - | 100 | 700 |
| Shower | - | - | - | - | 250 |
| Electricity | - | - | - | - | 200 |
| WiFi | 200 | - | 180 | - | 980 |
| Transport | - | - | - | 350 | 750 |
| TOTAL | 2,860 | 2,045 | 2,375 | 450 | 17,215 |
Endnote
Was this post useful for you? Please let me know and feel free to ask any question in the comments section! You can also support my work and Buy Me A Coffe. I will be immensely happy 🙂
If you also want to read a very detailed account on how each day of the trek is going to look like, including transportation when needed, the type of trail you’ll be walking and its difficulty and the main marvels you will be finding along the route, do check my other post ‘Walking in the Himalayas: day-by-day Annapurna Base Camp trek (ABC)‘.
If you are planning to spend some time in Nepal or you are curious about its culture, you can check here other posts about the three months I spent there. These are the ones currently available: